





.webp)
Introduction
There is nothing quite as frustrating as looking up at your ceiling and seeing a damp, spreading water stain. You head upstairs to check the terrace, expecting to find a gaping hole or a massive fracture in the flooring. Instead, you find... nothing. The tiles look completely fine.
This exact paradox, having absolutely no cracks visible on the surface while your home is still leaking, is one of the most deceptive and stressful issues a homeowner can face. It often leads to endless guesswork, wasted money on superficial patches, and the constant fear of the next heavy downpour.
What many don’t realize is that water doesn’t need a massive structural fracture to wreak havoc on your property; it just needs a microscopic pathway. Traditional cement-based grouts easily degrade under harsh weather conditions, essentially turning the spaces between your tiles into open channels for moisture.
If you are tired of temporary quick-fixes that fail season after season, it’s time to pivot to a permanent solution. In this comprehensive guide, we will break down exactly why this invisible damage happens and how high-performance epoxy tile grout from Tintique Chemicals can completely seal your tile joints, halting leaks in their tracks and protecting your terrace for the long haul
Understanding the Problem: Why Is Your Terrace Leaking?
When a terrace leaks despite having no visible cracks in the tiles, it’s easy to feel gaslit by your own home. However, the breakdown is happening on a microscopic level right between your tiles, driven by two seasonal forces:
1. Intense Heat Causes Expansion

Terraces bear the brunt of extreme weather. During the day, intense heat causes expansion in the tile layer. Because standard cement-based grouts are rigid and highly porous, this constant thermal expansion and contraction creates microscopic fractures along the tile joints. While these micro-fissures are practically invisible to the naked eye, they completely compromise the water barrier.
2. Rainwater Seepage
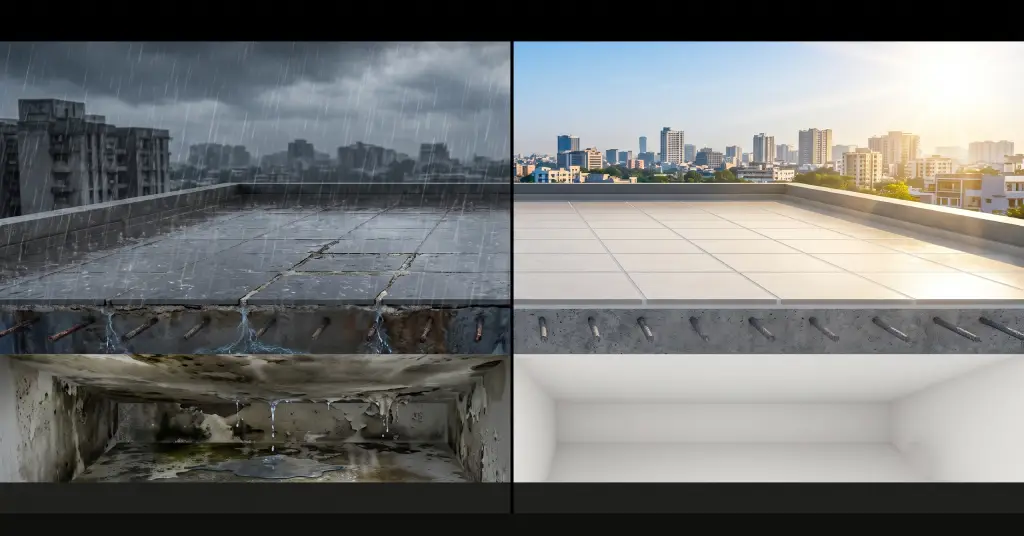
Once those microscopic pathways open up, the next heavy downpour spells trouble. Rainwater seeps in through these hidden cracks. Instead of washing away across the surface, the water is pulled downward into the tile joints, pooling underneath the flooring and eventually soaking through the concrete slab into your living space.
To stop this hidden water seepage, you have to replace the vulnerable joint filler with something completely impermeable: epoxy tile grout.
How to Apply Epoxy Tile Grout: A Step-by-Step Guide
Successfully waterproofing your terrace joints requires precision. If you follow this three-step application process carefully, you can create a permanent, weather-resistant barrier.
Step 1: Prepare the Joints
Before you mix a single drop of product, you must lay the proper groundwork.
Scrape the Joints: Take a joint-scraping tool and carefully clean out the existing, failing tile joints. Remove any old, degraded cement grout that is loose or crumbling.
Clear the Debris: Thoroughly vacuum or brush away all dust and dirt from the grooves.
Eliminate Moisture: The joints must be entirely free of moisture before application. If you apply epoxy grout over trapped water, it will fail to bond correctly, leaving gaps for future leaks.
Pro-Tip: Ensure the terrace has had a few dry days to completely evaporate any deep-seated moisture within the joints before you begin.
Step 2: Mix & Fill
Epoxy grout is a multi-part chemical system that relies on a chemical reaction to harden and form a waterproof seal.
Proper Mixing: Mix the epoxy grout components properly according to the manufacturer's exact specifications. Incomplete mixing will result in soft spots that won't cure.
Complete Filling: Using a rubber grout float, force the mixture firmly into the spaces. Ensure that you completely fill the tile joints from top to bottom. Do not just skim the surface; packing the joints tightly prevents hollow air pockets where water could potentially collect.
Step 3: Let it Set & Clean
Timing is absolutely critical in this final step. Epoxy resin sets hard like plastic, so you must clean up before it cures completely.
The Hardening Window: Allow the grout to harden for 15–20 minutes after application. This gives the mixture enough time to firmly stabilize in the joints.
The Cleanup: Once those 15–20 minutes are up, immediately wipe off excess resin with a damp cloth. Work in gentle, circular motions to smooth out the joint lines and wipe the tile faces clean for a flawless finish.
Why Epoxy Grout Wins Against the Elements
Traditional cement grout absorbs water like a sponge and cracks under thermal stress. Epoxy grout, on the other hand, is completely non-porous. Once cured, it forms a dense, plastic-like shield that water simply cannot penetrate. It remains slightly flexible, meaning it can tolerate the intense heat expansion of summer and the heavy downpours of the monsoon season without flaking or breaking apart.
Protect Your Terrace for the Long Haul
Leaving a terrace leak unaddressed can lead to severe structural damage, rusted rebar, and ruined interior paint. Replacing failing joints with epoxy tile grout is the single most effective way to halt hidden water seepage right in its tracks.
Ready to secure your home against the elements? Protect your terrace with Tintique Chemicals. For premium waterproofing solutions, expert advice, or product inquiries, reach out directly to the professionals at +91-807 179 2487.
Keep an eye out for our next post: Full resin protection for your terrace!
